Multipass is a tool created by Canonical that makes it easy to create Virtual Machines which by default run the latest LTS version of Ubuntu. On Linux it uses KVM as it's hypervisor and if it isn't already present on the Host can be installed by a simple snap command.
sudo snap install multipass
In this post I'll describe how to create a single Virtual Machine running Nginx and use a cloud-init file to modify the newly created instance.
This will be used to create a couple of additional users, upgrade the machine, install the latest Nginx package and start the service. As well as creation of the users we'll also upload some Public keys to allow ssh access (although Multipass does create a default user and up-loads a Public key from the Host).
We'll use one of the extra users to allow confirmation that the Nginx service is running, and if necessary re-start it using Ansible from the Host machine.
Using Multipass
Multipass has been designed to be quick and easy to use and has a relatively simple set of commands.
multipass --help
Usage: multipass [options] <command>
Create, control and connect to Ubuntu instances.

This is a command line utility for multipass, a
service that manages Ubuntu instances.

Options:
  -h, --help     Display this help
  -v, --verbose  Increase logging verbosity. Repeat the 'v' in the short option
                 for more detail. Maximum verbosity is obtained with 4 (or more)
                 v's, i.e. -vvvv.

Available commands:
  delete    Delete instances
  exec      Run a command on an instance
  find      Display available images to create instances from
  get       Get a configuration setting
  help      Display help about a command
  info      Display information about instances
  launch    Create and start an Ubuntu instance
  list      List all available instances
  mount     Mount a local directory in the instance
  purge     Purge all deleted instances permanently
  recover   Recover deleted instances
  restart   Restart instances
  set       Set a configuration setting
  shell     Open a shell on a running instance
  start     Start instances
  stop      Stop running instances
  suspend   Suspend running instances
  transfer  Transfer files between the host and instances
  umount    Unmount a directory from an instance
  version   Show version details
To find out if there are any Multipass machines running and their version it is a simple case of running multipass ls.
multipass ls
No instances found.

multipass version
multipass  1.5.0
multipassd 1.5.0
To launch a basic machine we use the following.
multipass launch -n my-test-vm
Launched: my-test-vm

multipass ls
Name                    State             IPv4             Image
my-test-vm              Running           10.205.150.176   Ubuntu 20.04 LTS

multipass info my-test-vm
Name:           my-test-vm
State:          Running
IPv4:           10.205.150.176
Release:        Ubuntu 20.04.1 LTS
Image hash:     bb0a97102288 (Ubuntu 20.04 LTS)
Load:           1.76 0.58 0.20
Disk usage:     1.2G out of 4.7G
Memory usage:   140.5M out of 981.2M
This creates a basic Virtual Machine, based upon the latest 20.04 LTS, with a default disk size of 5G, 1G of memory and 1 CPU.
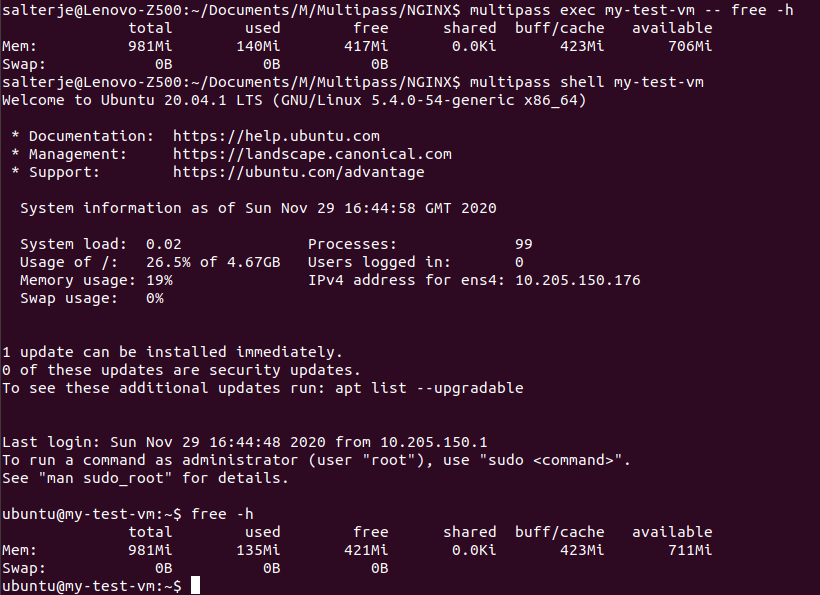
It is simple to either run a command within the newly created machine or log on via a shell session.
Commands can be run using
multipass exec my-test-vm -- free -h
An ssh session to the Virtual Machine is as easy as running
multipass shell my-test-vm

This makes it very easy to create test machines which can just as easily be deleted and purged from the Host.
multipass delete my-test-vm
multipass purge
This removes any trace of the created Virtual Machines.
It is also possible to add arguments to define disk size, memory, CPU and the base image to be used.
It's also possible to use a cloud-init file to further modify the base image and this is what we will use to create our Virtual Machine with extra users, uploaded Keys and the for the installation of Nginx.
#cloud-config
hostname: nginx-node

users:
  - name: test
    groups: sudo
    shell: /bin/bash
    sudo: ['ALL=(ALL) NOPASSWD:ALL']
    ssh-authorized-keys:
      - ssh-rsa AAAAB3NzaC1yc2EAAAADAQABAAACAQC1fGw9YMWDZQwOzqcSEsGDgxWJYN0sNhFzn4R2i4OmFxW0+GGV1qKM9UdE/N1PzN3bBDXPWOvpQMRMFH3rkRdu8K2+wY6BFSOTkMqKkG9Q5ityO5uxQ8ReOaQeVww8+64ye1UWIR7/eGt2D/cA1Ah6tttT75ZMBXasiH/9Phsg8vIff8Oc4O39IEdFKgj8a60dE8SfbC7ACvWVokOB9BTc6kCoVoPz1H/FJFdl92ZsPGq0ELHpH5bZmOLNcmU/To1WG5nEGXsPi/A2bYcUKbtT/j0UfxtBD9qmAPYh5cOgyiNTImd0aRs8gWYWG4aSsIbMlRgrkYmIna0sp7rk72NDJmk5iUD/aD4jBTkmDLhpt/0UJvzNWHsrKhe9arYnkO1d3IsH7GcbajFjAlJP1CEXOnUjGmhIjNjufZ5Eva0V9Yap6tpnZlsV9ZO3Is1F/uin89dRvJK7tzLwQv0OCf32BDO1MkRPSrzMUTSfqG+M7tt+rAetNubEzBQ7/tkbcYQSDfTu1ptPuktN2L127gT51mM7I5Ciub5HYsOHuBeKQR/Vn7HUIPY5tgzIktXx6XqvTsrOWDa0LaFWkKhFr4OaE8yBGY32xVgBCN7ovKY/OndZ2eJ++xKZQ6IOrkPweNxtjm8rPezjfaDIxl4QFAGcFg2IIvZTMt99+IPN7zxLaQ== test@test.com

  - name: ansible
    groups: sudo
    sudo: ['ALL=(ALL) NOPASSWD:ALL']
    ssh-authorized-keys:
      - ssh-rsa AAAAB3NzaC1yc2EAAAADAQABAAACAQDL9WIfSsSP+4vKCCP+al+9dSgfJjXtDUKhAhG6r/Rh1pMevrZRz4FH7xWuJs5B5GLnRBkp9cfrPHHzqnR6KtnmAhV124M/9hiNdWnr2J+p2vBHk1BehO1ZCO6TVom8AXS1zCIsdN9JcvnqbaUuZEEiRXUWIdrH3EZyVzwBpvBCJ9k0hZ/nucLMdq04c9pVA49SnYh4UQv74QowjHk9NG5lgntzuzw3HoU5iJw610taTNGirX8ovCvA/C3cYpKYWPXVJrykFyMxARqbDbqokyeozIHTiHN/tg8ZDKd5rPD78UV3s4TKoWaZEeH6FkbsQcepJCkRqpl7JsnqtCXpKtd20yMA4UnNdwxOfIUL+O+VPWzCpe6VqOsnr7iEoh1jKlF1Y5e7YK7L6yk8Flmw9P60UBoJqICshcH0mKVpS7J3G4zMWM3p6Rk2EwY8KVcDzydy+7mNqeXUUQQg9jMItMfpfTCZz2nRdoVCHctn/4LFDyTLPFk2WC2M/+3+cc6QW1PuqQavJGBr9jszPmPY8+3VJEATlwy0UOfx/A+LQeosk2xPZeff5esZw/Tl17qWuJxVMZjLzlqh8SB/wImaGrDTxvFsU3LKEc0+Gm3crdxcU0/vltLMOIODbsRxc8KBuFtLql13fHCI+OpJ/YlNjKUamUoSfPkl6ZLuHkEvIeWOPw== ansible user

package_update: true
package_upgrade: true
packages:
  - nginx
  - curl
  - htop
runcmd:
  - systemctl enable nginx
  - systemctl start nginx

final_message: "Complete"
The YAML file has all the details needed to create two new users (test and ansible), add them as sudo users with no password and upload a public key when the Virtual Machine is first created.
It will also update and upgrade all packages as well as installing nginx, htop and curl.
The final lines will start the Nginx service.
Creating our Machine
The cloud-init file will be used by adding the appropriate argument
multipass launch --cpus 1 --disk 20G --mem 1g --name nginx-node --cloud-init ./nginx-cloud-init.yaml
This creates a Virtual Machine called nginx-node
multipass ls
Name                    State             IPv4             Image
nginx-node              Running           10.205.150.231   Ubuntu 20.04 LTS

multipass info nginx-node
Name:           nginx-node
State:          Running
IPv4:           10.205.150.231
Release:        Ubuntu 20.04.1 LTS
Image hash:     bb0a97102288 (Ubuntu 20.04 LTS)
Load:           0.05 0.41 0.27
Disk usage:     1.4G out of 19.2G
Memory usage:   147.6M out of 981.2M
We can confirm the test user has been created by logging onto the machine using the appropriate private key from the Host machine.
ssh test@10.205.150.231 -i nginx_rsa
The authenticity of host '10.205.150.231 (10.205.150.231)' can't be established.
ECDSA key fingerprint is SHA256:9BMIZHBH76VHJzhjYHlC7BbQl/58eCxGvUI26aUWn/I.
Are you sure you want to continue connecting (yes/no)? yes
Failed to add the host to the list of known hosts (/home/salterje/.ssh/known_hosts).

Welcome to Ubuntu 20.04.1 LTS (GNU/Linux 5.4.0-54-generic x86_64)

 * Documentation:  https://help.ubuntu.com
 * Management:     https://landscape.canonical.com
 * Support:        https://ubuntu.com/advantage

  System information as of Sun Nov 29 17:09:21 GMT 2020

  System load:  0.0               Processes:             104
  Usage of /:   7.3% of 19.21GB   Users logged in:       0
  Memory usage: 21%               IPv4 address for ens4: 10.205.150.231
  Swap usage:   0%


0 updates can be installed immediately.
0 of these updates are security updates.


The programs included with the Ubuntu system are free software;
the exact distribution terms for each program are described in the
individual files in /usr/share/doc/*/copyright.

Ubuntu comes with ABSOLUTELY NO WARRANTY, to the extent permitted by
applicable law.

To run a command as administrator (user "root"), use "sudo <command>".
See "man sudo_root" for details.

test@nginx-node:~$
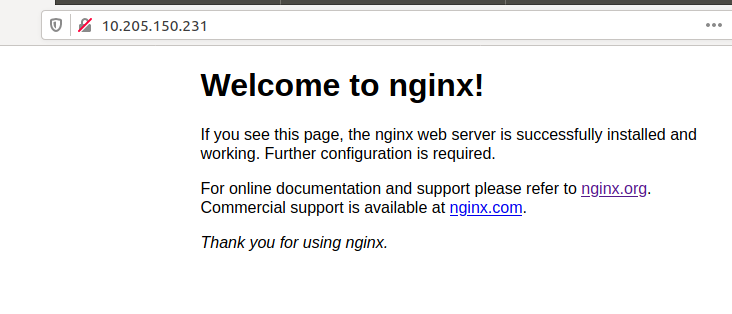
This confirms the creation of one of the extra users and a simple connection from the Host to the appropriate IP address confirms the normal Nginx test page.

Checking Connection Using Ansible
Our last checks will be to confirm if the Ansible user has been created, appropriate Key uploaded and sudo rights established to allow the newly created machine to be monitored and controlled via Ansible running on the Host.
A simple inventory file on the Host uses the IP address of our newly created Virtual Machine and points at the appropriate private key matching the uploaded Public Key for the ansible user.
[nginx]
10.205.150.231

[multi:children]
nginx

[multi:vars]
ansible_user=ansible
ansible_ssh_private_key_file=/home/salterje/Documents/M/Multipass/NGINX/ansible
To test the inventory file as well as the ssh permissions a simple ping can be sent using Ansible.
ansible -i test-ansible.yaml nginx -m ping
10.205.150.231 | SUCCESS => {
    "ansible_facts": {
        "discovered_interpreter_python": "/usr/bin/python3"
    },
    "changed": false,
    "ping": "pong"
}
This proves that Ansible has correct ssh permissions and the Virtual Machine is active.
We'll now run a simple playbook to ensure Nginx service is running, using our test inventory file.
ansible-playbook nginx-playbook.yaml -i test-ansible.yaml

PLAY [all] ***********************************************************************************************************************************

TASK [Gathering Facts] ***********************************************************************************************************************
ok: [10.205.150.231]

TASK [start nginx] ***************************************************************************************************************************
ok: [10.205.150.231]

PLAY RECAP ***********************************************************************************************************************************
10.205.150.231             : ok=2    changed=0    unreachable=0    failed=0    skipped=0    rescued=0    ignored=0
This proves the Nginx service is running and would re-start the service if it was found to be stopped. This can be proven by stopping the service and re-running the playbook.
ansible-playbook nginx-playbook.yaml -i test-ansible.yaml

PLAY [all] ***********************************************************************************************************************************

TASK [Gathering Facts] ***********************************************************************************************************************
ok: [10.205.150.231]

TASK [start nginx] ***************************************************************************************************************************
changed: [10.205.150.231]

PLAY RECAP ***********************************************************************************************************************************
10.205.150.231             : ok=2    changed=1    unreachable=0    failed=0    skipped=0    rescued=0    ignored=0

salterje@Lenovo-Z500:~/Documents/M/Multipass/NGINX$ ansible-playbook nginx-playbook.yaml -i test-ansible.yaml

PLAY [all] ***********************************************************************************************************************************

TASK [Gathering Facts] ***********************************************************************************************************************
ok: [10.205.150.231]

TASK [start nginx] ***************************************************************************************************************************
ok: [10.205.150.231]

PLAY RECAP ***********************************************************************************************************************************
10.205.150.231             : ok=2    changed=0    unreachable=0    failed=0    skipped=0    rescued=0    ignored=0
Conclusions
Multipass is a very useful tool to easily spin up Development machines on a Host with a couple of simple commands.
It can be combined with cloud-init to modify the base images to install packages, create users and upload keys. The same cloud-init files can then be used for the creation of cloud instances, meaning that testing and verification can be done locally.
In many ways Multipass performs a similar function to Vagrant but is probably easier to use for simple tasks. For more complicated tasks other provisioners such as Ansible can be used in combination.
I have started using Multipass where previously I have used Vagrant combined with Virtual Box and it has proven a quick and easy way of building combinations of machines for a range of testing scenarios.