PODs are the smallest unit that can be created and deployed within Kubernetes. They will often contain a single container but it is possible to have multiple closely coupled ones.
Containers within a POD share a common IP address which means they need to coordinate network resources such as ports.
All containers within a single POD can also share any kind of storage volume allocated to the POD.
In this post we'll create a basic POD and get an idea of why this is probably not the best way of deploying our containers within a cluster.
Creation of a POD
A POD can be created with it's own manifest file which will mostly define the specification of the container as well as any associated metadata.
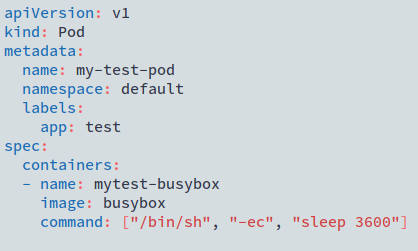
The YAML file creates a basic POD that contains a single BusyBox container. BusyBox is a very small linux distribution with a few useful GNU utilities. For our purposes it is a useful image to work with.
kubectl apply -f my-test-pod.yaml
We have now deployed a single POD with a BusyBox container running the sleep command to prevent it from shutting down straight away. We'll create an interactive terminal to log into the container to find it's hostname and IP address
kubectl get pods
kubectl exec -it my-test-pod -- /bin/sh
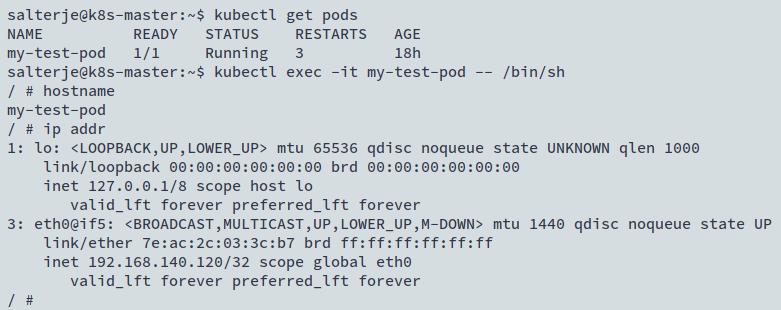
This is good and we can see that the POD is running ok. We'll now shut the POD down and observe what happens...
kubectl delete pod my-test-pod

kubectl get pods

It can be seen that the POD is now gone and has not been re-created. This can seem to be confusing initially as one of the big selling points of using Kubernetes is the self-healing of containers should they fail or a Node goes down.
The reason for the POD staying down is that self-healing is carried out by using another object called a ReplicaSet which will control the number of PODs that are deployed and ensure the desired number is always running within the cluster.
ReplicaSets are normally created using a Deployment object and we'll now create an identical POD using a Deployment.
Creating a Deployment
Deployments are the normal way of creating PODs and will allow access to the more powerful features of Kubernetes such as self-healing applications and horizontal scaling of the number of PODs within the Deployment.
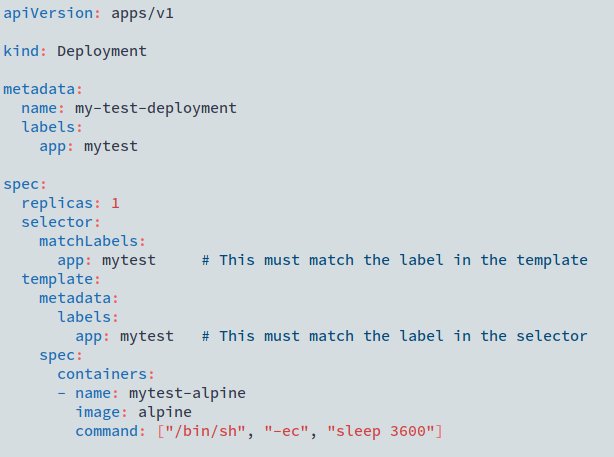
There is a little more within the YAML for the deployment with the container details being put into the template section.
The Deployment finds the PODs that it will manage using a selector field which must match the same label that is used within the POD template.
The other field that is worth noting at this stage is the replicas number, which in our case is set to 1. This tells the Deployment to create a Replicaset that will ensure there is always 1 POD running within the cluster.
We'll run the manifest file and take a look at what objects have been created.
kubectl apply -f my-test-deployment.yaml

It can be seen that there are now 3 objects that have been created, when filtering on the label app=mytest.
These consist of:
- The POD itself
- A ReplicaSet which controls how many PODs should be running
- The actual Deployment which links the ReplicaSet to the POD.
We'll now repeat the previous test by failing the POD.
kubectl delete pod my-test-deployment-5b8d76676-xwn7h
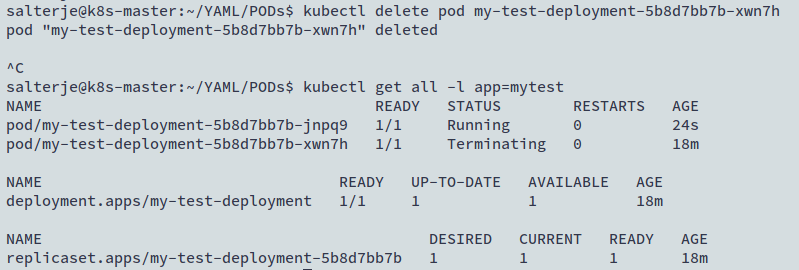
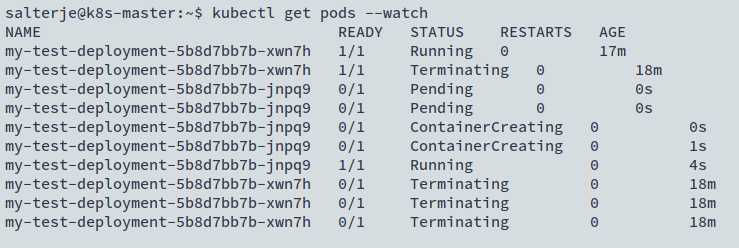
It can be seen that this time another POD is created when the previous one is shutdown.
It can also be seen that the names of the running PODs have been created automatically. This is linked to the use of the ReplicaSet that has also been created as part of the Deployment.
It can be seen the name of the ReplicaSet is taken from the Deployment Name but also has a random string added to the end of it. This naming convention is used when the Deployment is changed or scaled which will actually generate new ReplicaSets.
The name of the POD follows the same string as the ReplicaSet but also has another string attached to the end which identifies the POD. In our case there is only 1 POD but this is not necessary the case all the time (in fact the scaling of the number of PODs is one of the big benefits of Kubernetes).
Conclusions
This post is a very basic overview of the creation of a single POD on it's own and by placing it within a Deployment.
Most of the time, even for a single POD, a Deployment is a much better way of bringing up a POD as it allows Kubernetes to always ensure that it is running. This self-healing is actually done by a ReplicaSet object that will keep track of how many replicas of the POD are running.
The containers that are selected within the Deployment make use of selectors that are labels used to link to the container template.