There are a number of ways of interacting with AWS and in this post we'll run through the installation of the CLI client under Ubuntu 20.04. This will allow the running of AWS commands within a standard Bash terminal.
In this post we'll run through how to download the latest version of the client, check the GPG key of the downloaded zip file and then install it.
We'll also see how to give the client details of the Access Key ID and Secret Access Key that will enable it to connect to an existing AWS user account. This will be done by both using the generated config files as well as exporting them for a temporary connection.
We'll start with a base Ubuntu installation and first confirm that the client is not installed already.

The installation process we'll be following can be found here in the AWS Documentation.
Installing AWS CLI Version 2
Before we begin the installation the curl utility must be installed.
Getting hold of curl via snap
As we are using Ubuntu we'll load the necessary curl command with snap and use it to download the zip file for the installation.

Checking Installation Key
We're going to be extra careful and check the GPG key of the zip file
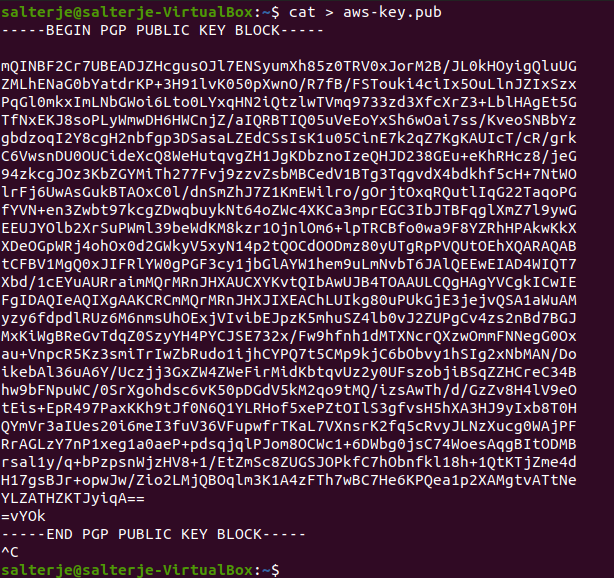
This is done by pasting the GPG Key into a text file.

We'll import the key that has just been created and compare it to the .sig file available from AWS.

The warning in the output is expected and doesn't indicate a problem. It occurs as we don't have a personal PGP key which means there isn't a chain of trust with the AWS CLI PGP key.
Installation of CLI client
We are now in a position to actually install the software after unzipping the download.
unzip awscliv2.zip

We can now confirm the client has been installed.

Connecting to Our AWS Account
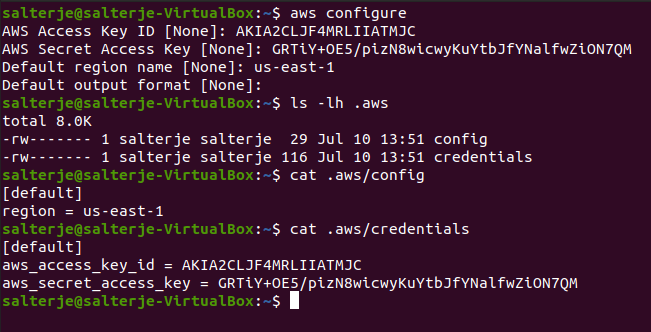
We are now ready to connect to our account. This is done by running the aws configure command and entering the relevant details for the account we will connect to.
This will prompt for the relevant Access Key ID and Secret Access Key for the account (the ones that I use here have been deleted and in normal conditions these credentials should never be shared).

The installation will create a hidden folder called .aws which is used to store the credentials and config details (in this case the default region that will be used when running the command).
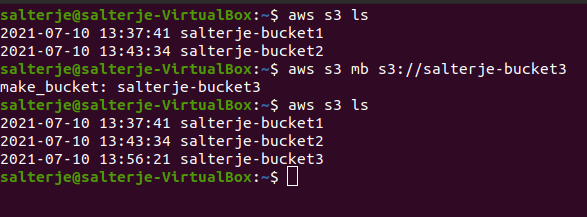
As a test I have listed the S3 buckets associated with the account and then created a new one.

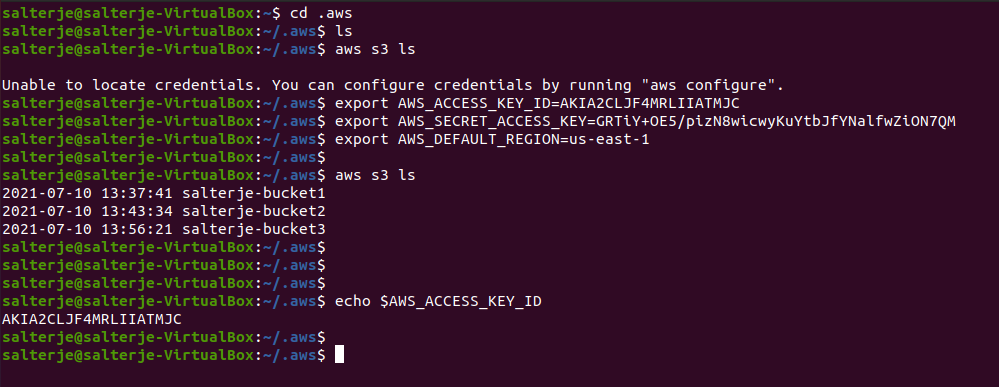
Of course this means that the credentials are stored within the files in the .aws folder. It is also possible to export the credentials and not create the files.

This means they will only be valid for that terminal session. Starting another session shows we can't log on to our account any longer.

Conclusions
The installation of the AWS ci client is straightforward and allows interaction by running suitable commands within a terminal. It makes use of Access-Keys and Secret Access-Keys that should be protected in the same way as usernames and passwords.
It is possible to create suitable files with these credentials within them by running aws configure, making things very convenient (but not particularly secure). Alternatively these details can be exported to run for that particular terminal session if an ad-hoc session is needed.